You can quickly and easily set up a time to meet with a customer.
The scheduler can be found inside of your “Leads” or “Customers” section in app
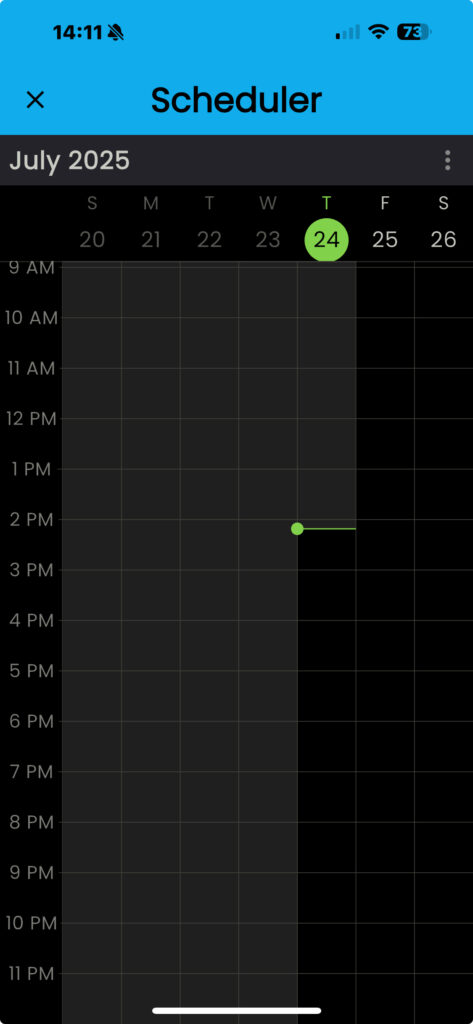
- Tap on “Calendar” icon
- Tap in an available area to choose a time slot
- The green marker line shows the current time
- KEEP IN MIND: Shaded grey areas are unavailable slots (above and left of the green line)
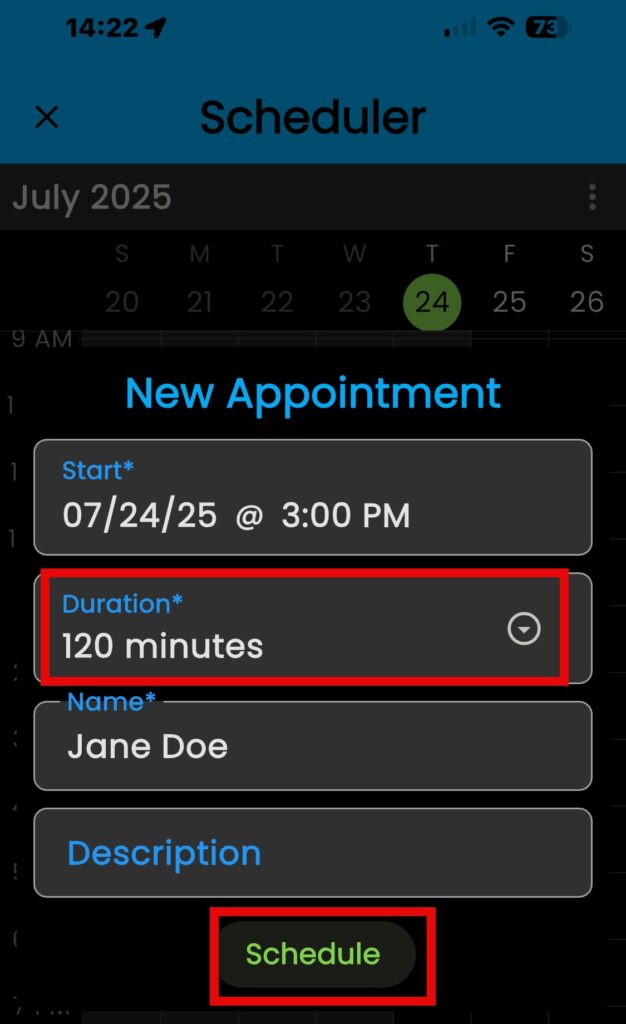
The “New Appointment” dialogue box will open
If everything looks good…
- Tap on “Schedule” to finalize your appointment
Alternatively, tap into any of the boxes to update. For example, to update the meeting duration…
- Tap in “Duration” box
- Choose a duration from the drop-down list
- KEEP IN MIND: Boxes denoted with an asterisk require information
- Tap on “Schedule” to finalize your appointment
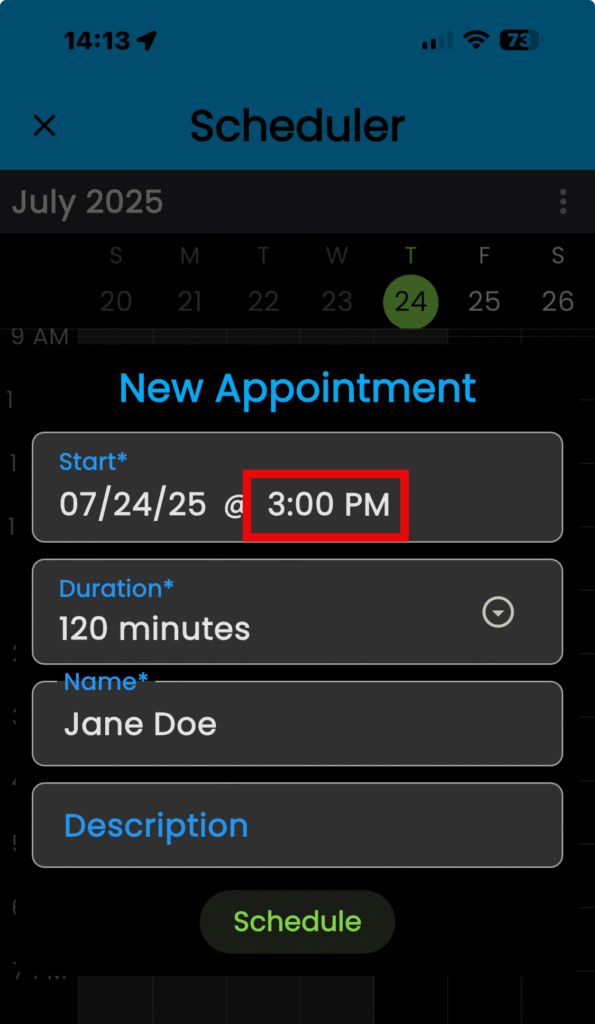
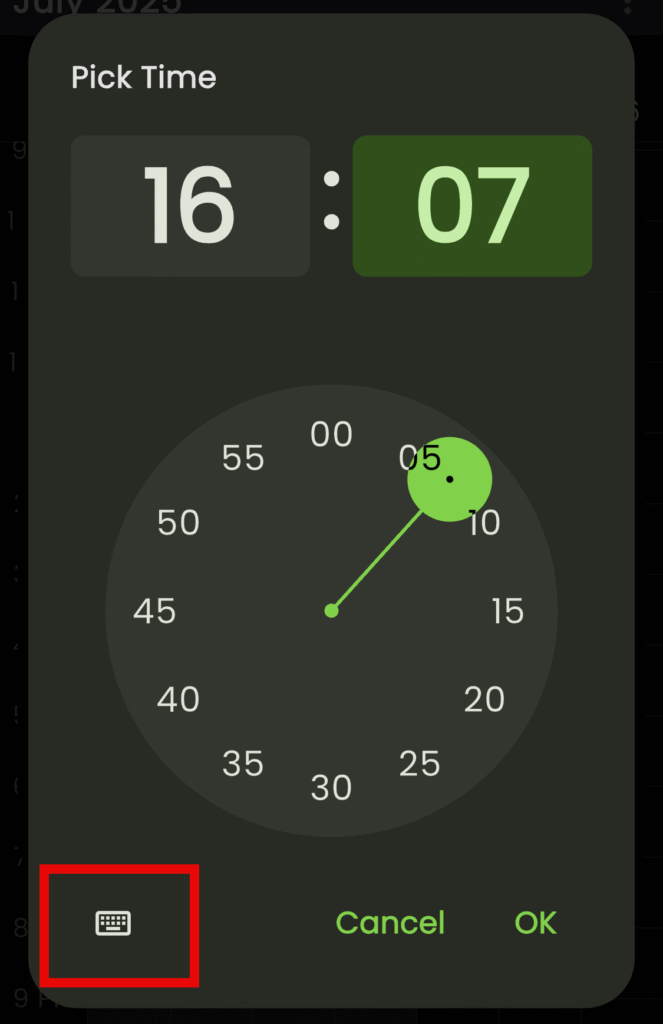
You can also fine tune the meeting time, for example if my meeting will start seven past the hour, we can update the minutes to reflect that time…
- Tap on the time in “Start” section
- Tap on the minute box to highlight it
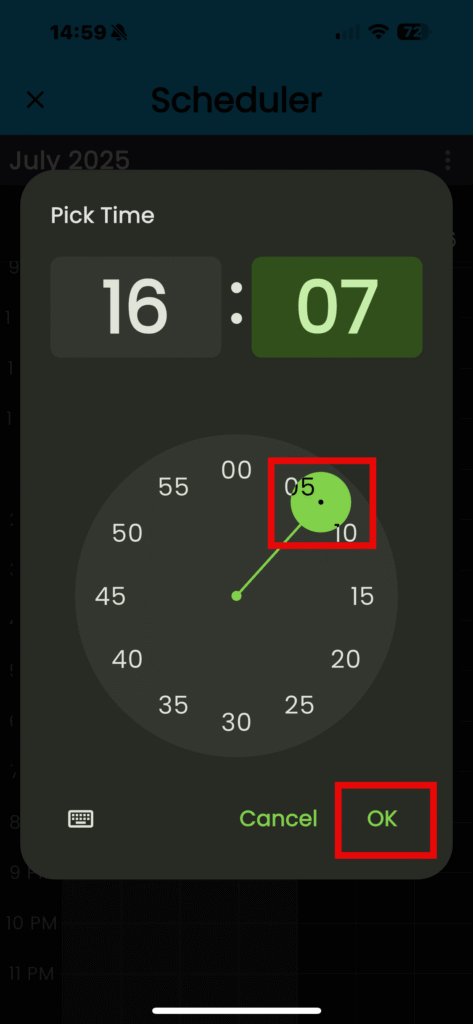
- Tap the round dial selector and hold it
- Rotate it to your desired time slot and release
- Tap on “OK”
- Tap on “Schedule” to finalize your appointment
KEEP IN MIND: If you find the dial selector difficult to use, you can switch to the keyboard layout. To do so, tap on the keyboard icon located in the lower left-hand corner of the “Pick Time” dialogue box.
- Tap in the minute box to select it
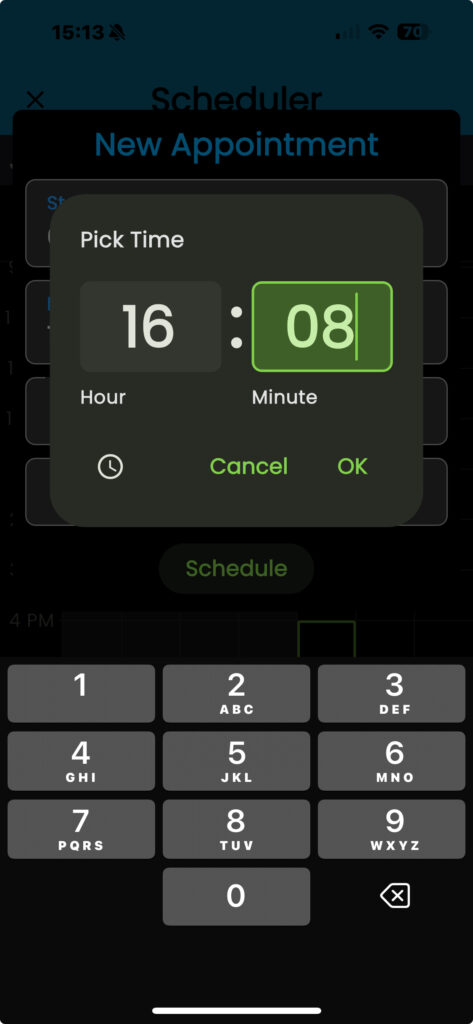
- The cursor will move to the end of the number
- Use the backspace button to remove the current time
- Choose your new time
- Tap on “OK”
- Tap on “Schedule” to finalize your appointment
Your new schedule will update in SalesForce and create a notification